Pages

Saturday, March 31, 2012

Easter Surprise part 2

You probably guessed....an Easter egg hunt. But this one had a bit of a twist. I filled the eggs with treats, put them in baskets & attached this sign.


On the back of the sign I wrote a note... to the lucky little people who would find the baskets....


I placed the baskets on the front steps of their houses


Hid all the eggs around the yard, hoping not to get caught! Their Mom's knew I was coming & closed the blinds just in case. :) Then I rang the doorbell and watched as the SURPRISE took place..


They were so darling... it didn't take the littlest one long to figure out which ones had the good stuff in them--- Jelly Beans!!!

border="0" alt=""id="BLOGGER_PHOTO_ID_5726251560289059090" />

I downloaded the you've been egged sign here at Eighteen25.blogspot.com

Easter Carrots

These are one of our favorite things to make for Easter. The first year I made them I filled them with jell-o popcorn, then the next year I used cheetos, but the last 2 years I have filled them with goldfish crackers. I like to displayed them in this glass jar- they're easy & always a hit with kids & adults too.

Here are the supplies that you will need to make the carrots...


And this is what the look like ...


So first you fill your triangle shaped clear bag with the goldfish- then take some green easter grass & fold it in half like this


Then stuff it into the bag, you can't really see it- but the bag comes up over the bottom of the grass, this helps to hold it in place.


then take a piece of green ribbon and tie it around the bag securing the grass inside. It ties up really nice & tight...


And finally this is what you end up with.. the cutest little carrot on the block!

Friday, March 30, 2012

Easter Surprise

I am getting things ready for a fun SURPRISE for the Grandkids tomorrow morning!


so pop in tomorrow and I'll let you in on the secret... and maybe a few more pictures!!! :)

Thursday, March 29, 2012

Dipped Strawberries

I dipped some strawberries lastnight for dinner, they are something we have quite often around here. I have people ask me to show them how to do this all the time... so I thought that you might like to see what I have learned after dipping a zillion of these yummy little things

First wash and dry your strawberries, I like to just hold them at the top like this. Dip the strawberry into a bowl of chocolate that has been melted in the microwave. Tonight I had white chocolate- but you can use milk chocolate too.


Dip each one and set them on a sheet of parchment paper to dry. If you are going to use sprinkles you will need to do it now before the chocolate dries. I put sprinkles on two of them to show you what they look like.


I like to drizzle with the disposable decorating bags. Place what ever you are using to drizzle in the bag, I usually use two different colors. You can use white or milk or dark chocolate- I had the candy melts already in these two bags, so that is what I used. Heat the bags in the microwave for 30 seconds at a time until smooth


Drizzle each color onto the strawberries- until they look the way you want them to. Don't they look lovely! And they tasted even better.. I timed it from start to finish, it took me 15 minutes to prepare these, so now you know why we have them a lot-- they are very fast to make.


Then I put the bowls of chocolate & the bags on a shelf in my pantry. This way they are ready to go, and I find I use them more often.

Jars- Jars- Jars

These were a HAPPY BIRTHDAY present for a cute friend of mine. I told her it was like giving away a couple of my kids—lol I don't know what I Love more the jars or the candy! I had forgot how much I like good & plentys. Good thing she came when she did or she might have gotten EMPTY jars. Yumm


This is what they looked like before. I know I have a problem; they are so fun to make- so I just keep making them. ha ha


Tara & Lori painted theirs black-- so cute. They are easy to make- just collect your STUFF (jars, bases, lids) and then: paint, glue, and fill! Each one has its own personality.

Door organizers

I have seen these over the door organizers all over the web-- and I love them, so here are a few ways I have decided they would help me. This one is on the inside of one of my pantry doors, it has all the little things you need straws, tooth picks, food picks, skewers in all sizes, sucker sticks, napkins, plastic table cloths, birthday candles, plastic utensils, plastic cups, crockpot liners you get the picture. It has been so nice to be able to see them at a glance.


This one holds all of our winter stuff- gloves, scarfs, headbands, ear muffs, hand warmers, hats, flashlights (I know that’s not a winter thing- but it's handy lol) and a few other things I can’t remember-- but each pocket has a label so you can find what you’re looking for-- and the main idea for the label was that I hoped they would get put back where they belong.. but sometimes that doesn't happen so well. haha


This one is on my linen closet door- I have all my linen napkins,small table cloths, corn bags, lint rollers,small hand sanitizers, lip glosses, chap stick, baby things (actually Grandbaby things) like clippers, brushes, meds. bath soap, lotions, sm. packs of wipes pretty much anything I needed a place for. The possibilities for these organizers are amazing.. they are a great way to keep everything where you can see them & they really do use space that otherwise is wasted space. Can't say enough how much I love these-- I would love to know if you have found any other uses for them!! My problem is I am running out of doors!!

Spring Tablescape

I have had the same Spring tablescape for 3 years, but this year I changed it up a little bit. I had all these fun linen napkins in spring colors so I put one inside each goblet glass, I like the extra pop of color it adds.
I bought the colored bowls at tai-pan a few years ago.. they were suppose to be ice-cream bowls


So there you have it! pretty simple, but it works for us. We don't eat @ the table a lot during the week with just two of us at home.. but on Sundays when the whole family comes for dinner it looks like I have been working really hard to make it nice for them- haha And I have (cooking the dinner) ;) I love when my family gets together!! I'm not one to save the NICE dishes for special occasions, we use them anytime.. because EVERYDAY is special!

Wheat grass

I LOVE to plant wheat grass every year, it's kinda like my spring fever coming out-- it brings a little bit of spring time inside. This year I decided to try some in clear taller containers & I really liked how they turned out.. look you can see all the layers. Want to plant some too? It's easy.. 1st take some wheat, I have only ever used red wheat- but I'm sure any kind would work. So take 1 cup of wheat & pour it in a bowl, cover it with water & soak it over night (sorry I didn't take a picture of this first step) Note: 1 c. of wheat will fill 4-6 containers depending on how big they are, so it goes a long way......


in the morning pour your wheat into a colander and rinse a couple of times with water-- I usually leave it in the colander in the sink for most of the day & rinse it 4-5 times throughout the day keeping it moist.

If your container is deep then you will want to fill it with some gravel or rocks. This is what I love about the clear containers- you can see everything. This picture is of a tin container I used to plant some it.


if your container shallow then you don't need any rocks on the bottom- next put a layer of dirt or potting soil into your container, it only needs to be about 1 inch deep.


Next take your wheat and sprinkle it on top of the soil, do not push it into the soil-- just lay it on top, make sure that you cover the soil completely- try not to leave any holes where the soil shows through. You can see in this picture it covers almost all the soil, be careful not to spread the wheat too thick just a single layer...


Then take some potting soil & sprinkle it lightly on top, you don't need to cover it completely. Next take a spray bottle filled with water & spray it well. Don't let the water puddle. I always wrap plastic on them for a couple of days to help get it started. Place containers in a spot that gets a lot of direct sun light, remove the plastic each day & water with the spray bottle. It takes about 3 days for it to sprout up at this point remove plastic and leave it off.


By day 5 you should have nice green wheat grass a few inches tall.

Easter Party 2011

I am trying to get things planned for our Easter party this year and I came across these pictures of Easter last year so I thought that I would share them...


some of our favorites done up in mini glasses: banana cream pie, layered jell-o, and berry berry smoothies ( actually their are a few vegetables in the smoothies) yumm


Easter Basket cupcakes--


water bottles with labels. I wrapped them with a strip of paper and then used my 2 inch scallop punch to make the easter tags. I found the tags an skiptomylou.com

we chocolate dipped some peeps & left some just like we found them..

General Conference Cheetos

Okay one last thing for general conference!!!

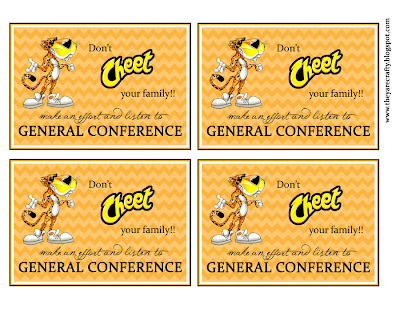
Everyone loves Cheetos so why not make a conference tag so that you can enjoy a bag during?


Download the tags here


General Conference Power Drink

Here are some last minute reminders you can give out for general conference!
Download them here